SwiftUI and Protocols: Integrating Protocol-Oriented Programming in Modern iOS Development
SwiftUI, combined with Swift's protocol-oriented programming, allows for a more modular, flexible, and reusable codebase. In this blog post, we will explore how to integrate protocol-oriented programming in SwiftUI by creating a simple app with custom views and behaviors.
1. Understanding Protocol-Oriented Programming in Swift
Protocol-oriented programming is a design paradigm that focuses on using protocols as the primary means of structuring and organizing code. In Swift, protocols are used to define a blueprint of methods, properties, and other requirements that suit a particular task or functionality.
Let's begin by defining a simple protocol:
protocol Drawable {
    var description: String { get }
    func draw()
}
Now, we can create a custom structure that conforms to the Drawable protocol:
struct Circle: Drawable {
    var radius: Double

    var description: String {
        "Circle with radius \(radius)"
    }

    func draw() {
        print("Drawing a circle with radius \(radius)")
    }
}
2. Creating Custom Views with SwiftUI and Protocols
Let's create a custom view in SwiftUI that displays a shape based on a given Drawable object. First, define a protocol for a view model that holds a reference to a Drawable object:
protocol DrawableViewModel: ObservableObject {
    var drawable: Drawable { get }
}
Now, create a custom view called ShapeView that takes a view model conforming to the DrawableViewModel protocol:
import SwiftUI

struct ShapeView<ViewModel: DrawableViewModel>: View {
    @ObservedObject var viewModel: ViewModel

    var body: some View {
        Text(viewModel.drawable.description)
            .padding()
            .background(Color.green)
            .cornerRadius(10)
            .foregroundColor(.white)
    }
}
3. Implementing Protocol-Oriented Behavior in SwiftUI
In this example, we will create a simple app that allows users to toggle between displaying a circle and a square. Start by defining a new protocol called Toggleable:
protocol Toggleable {
    mutating func toggle()
}
Now, extend the Circle structure to conform to the Toggleable protocol:
extension Circle: Toggleable {
    mutating func toggle() {
        radius += 10
    }
}
Create a new structure called Square that also conforms to the Drawable and Toggleable protocols:
struct Square: Drawable, Toggleable {
    var side: Double

    var description: String {
        "Square with side \(side)"
    }

    func draw() {
        print("Drawing a square with side \(side)")
    }

    mutating func toggle() {
        side += 10
    }
}
4. Building the App with SwiftUI and Protocols
Create a view model that conforms to the DrawableViewModel protocol and holds a reference to a Drawable and Toggleable object:
class ShapeViewModel: ObservableObject, DrawableViewModel {
    @Published private(set) var drawable: Drawable

    init(drawable: Drawable) {
        self.drawable = drawable
    }

    func toggleShape() {
        if let toggleableShape = drawable as? Toggleable {
            var mutableShape = toggleableShape
            mutableShape.toggle()
            drawable = mutableShape
        }
    }
}
Finally, create the main app view that contains a ShapeView and a button to toggle the shape:
import SwiftUI

struct ContentView: View {
    @StateObject var viewModel = ShapeViewModel(drawable: Circle(radius: 10))

    var body: some View {
        VStack {
            ShapeView(viewModel: viewModel)
                .padding()
            Button(action: {
                viewModel.toggleShape()
            }) {
                Text("Toggle Shape")
                    .padding()
                    .background(Color.blue)
                    .cornerRadius(10)
                    .foregroundColor(.white)
            }
        }
    }
}

struct ContentView_Previews: PreviewProvider {
    static var previews: some View {
        ContentView()
    }
}
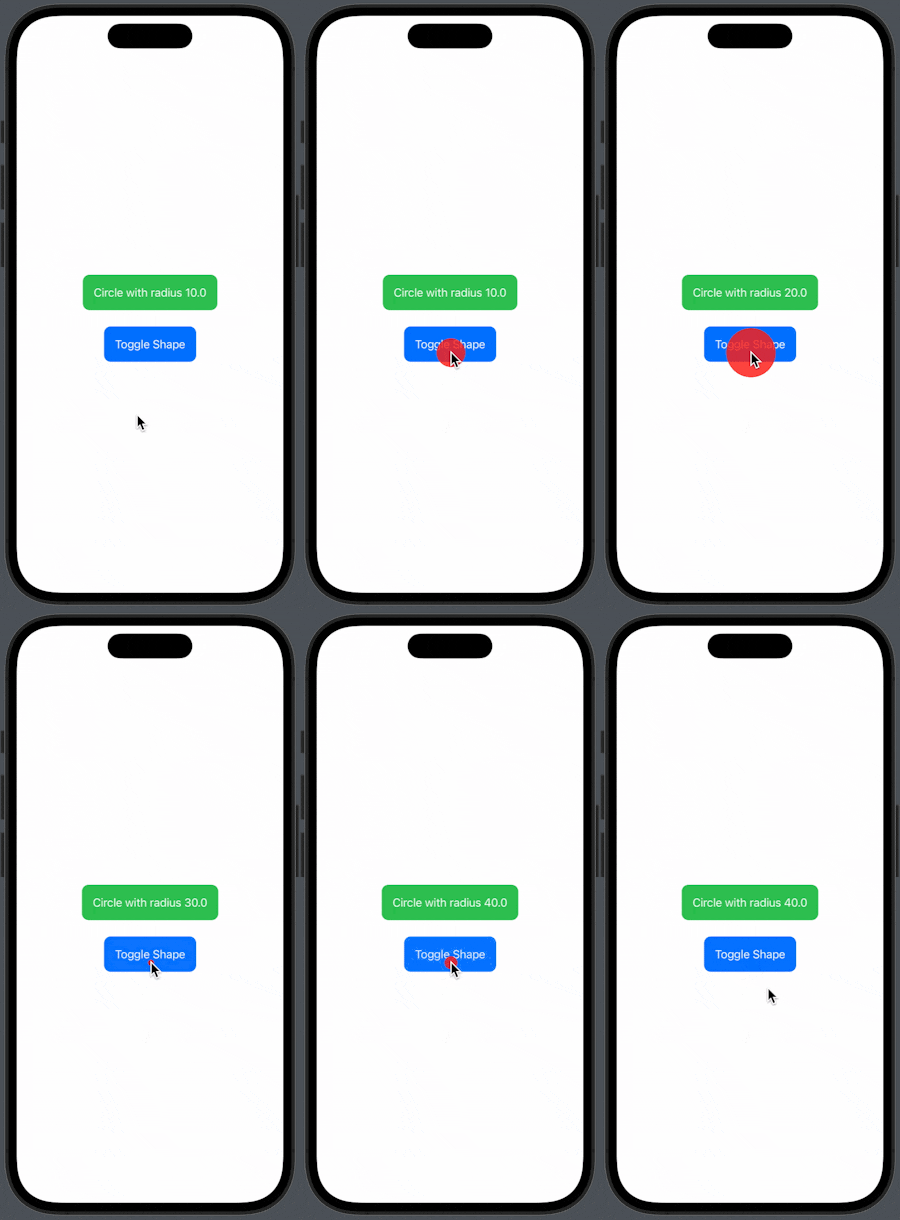
With this setup, you can now run the app and see the custom ShapeView displaying the current shape (either a circle or a square), with its size changing every time you press the "Toggle Shape" button.

Conclusion
We explored how to integrate protocol-oriented programming in SwiftUI by creating a simple app with custom views and behaviors. We demonstrated how protocols can be used to define shared functionality and requirements, which can then be implemented by different structures to create a modular, flexible, and reusable codebase.
By combining SwiftUI and protocols, you can enhance your iOS development experience and create more robust, maintainable, and scalable applications.
I hope you enjoyed this article, and if you have any questions, comments, or feedback, then feel free to comment here or reach out via Twitter.
Thanks for reading!
